
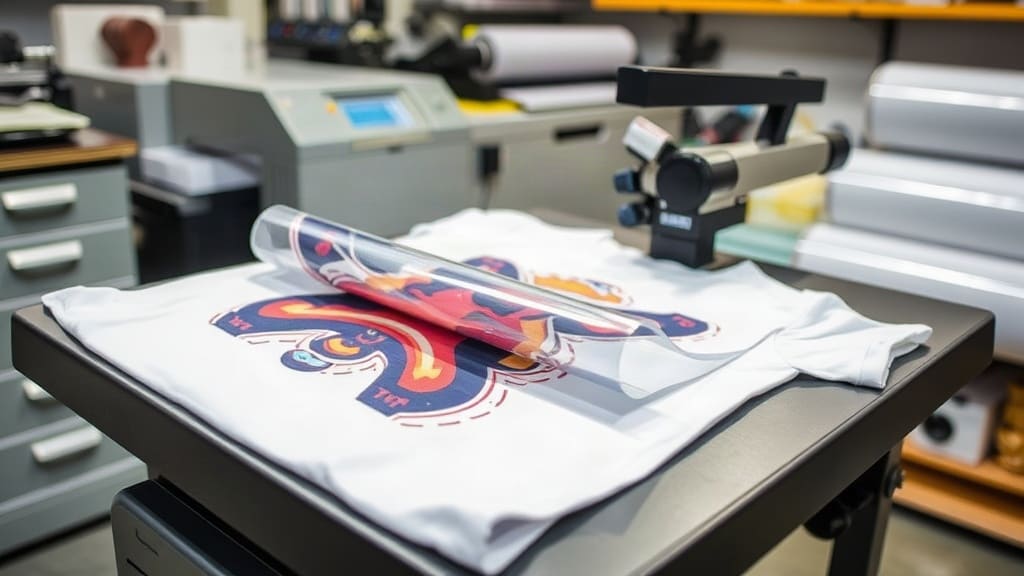
If you're looking for a versatile, cost-effective way to create custom apparel, DTF transfers might be exactly what you need. I remember the first time I tried DTF printing; I was blown away by how vibrant and durable the prints were, especially on dark fabrics. Unlike traditional methods, DTF transfers work on almost any material, from cotton to polyester, without requiring pre-treatment. Whether you're starting a side hustle or expanding your print shop, this guide will walk you through everything you need to know about DTF transfers, from the basics to advanced tips.
What Are DTF Transfers?
DTF stands for Direct to Film. It's a printing method where a design is printed onto a special PET film, coated with adhesive powder, and then heat-pressed onto the garment. The process is similar to heat transfer but with a crucial difference: the design is printed with film-specific inks that bond to the film and then transfer to the fabric. This results in a soft, flexible print that doesn't crack or fade easily.
How DTF Printing Works
The process starts with a digital design, which is printed onto a PET film using a DTF printer. After printing, a hot-melt adhesive powder is applied to the wet ink, and the film is dried. Then, the film is placed on the garment (or any substrate) and heat-pressed for about 15 seconds at 160°C (320°F). Once peeled, the design is permanently bonded to the fabric.
Key Components of DTF Transfers
- PET Films: High-quality films ensure good ink adhesion and smooth peeling.
- DTF Inks: Water-based or eco-solvent inks are used, often with CMYK plus white.
- Adhesive Powder: This is what makes the transfer stick to the fabric. It must be applied evenly.
- Heat Press: A flat or clamshell heat press is essential for proper transfer.
Why Choose DTF Transfers for Your Apparel?
I've used screen printing and vinyl, but DTF transfers offer distinct advantages that make them my go-to for many projects. Here are some reasons why you should consider DTF:
Versatility Across Fabrics
You can apply DTF transfers to cotton, polyester, blends, nylon, leather, and even denim. This versatility means you can offer custom prints on a wide range of products, from t-shirts and hoodies to tote bags and caps.
Vibrant Colors and Fine Details
Because you print a white base under the design, colors pop even on dark garments. The resolution is high, so intricate details and small text come out sharp.
No Weeding Required
Unlike vinyl, you don't need to weed out excess material. This saves a lot of time, especially for complex designs.
Durability
After pressing, the print is stretchy and resistant to cracking. It can withstand many washes, making it a reliable choice for custom apparel.
DTF Transfers vs. Other Methods
To give you a clear picture, I've compared DTF transfers with other popular techniques:
| Method | Pros | Cons |
|---|---|---|
| DTF Transfers | Versatile, no weeding, vibrant on dark, cost-effective for small runs | Requires special equipment and films, limited to flat surfaces |
| Screen Printing | Low cost per unit at high volumes, durable | Setup is expensive, not ideal for small orders or full-color |
| Heat Transfer Vinyl | Simple, low cost for small jobs | Weeding time, limited colors, not great for photos |
| Sublimation | All-over print, permanent | Only works on polyester and light colors |
Step-by-Step Guide: How to Make and Apply DTF Transfers
If you're ready to start using DTF transfers, here's an in-depth walkthrough based on my experience:
Step 1: Design Your Artwork
Create or choose a design using graphic software like Adobe Illustrator or Photoshop. Ensure it's in the correct format, preferably PNG with a transparent background. For best results, keep the design within the printable area of your film.
Step 2: Print onto PET Film
Load the PET film into your DTF printer. The printer typically prints a white layer first (for dark designs) then CMYK colors. Make sure the printed side is facing up for the powder application.
Step 3: Apply Adhesive Powder
While the ink is still wet, cover the entire printed area with the adhesive powder. You can use a shaker or a powder applicator. Ensure even coverage, then shake off the excess.
Step 4: Cure the Powder
Heat the film with a heat gun or a curing oven to melt the powder slightly onto the ink. This step is crucial for the powder to stick; otherwise, it might fly off during transfer.
Step 5: Pre-Press the Garment
Place your garment on the heat press and pre-press it for a few seconds to remove moisture and wrinkles. This helps achieve a clean transfer.
Step 6: Transfer the Design
Place the film (with the design facing down) onto the garment. Set your heat press to about 160°C (320°F) and medium pressure. Press for 10-15 seconds.
Step 7: Peel the Film
While the transfer is still hot, peel the film off. If you prefer a matte finish, you can peel cold, but hot peeling gives a glossier look. After peeling, you can do a quick second press with a silicone sheet to ensure full adhesion.
Tips for Perfect DTF Transfers Every Time
Over the years, I've learned a few tricks that make a big difference. Here are my top tips:
- Use a quality film: Cheap films can cause poor ink adhesion and wrinkling.
- Don't skimp on powder: Inadequate powder leads to incomplete bonding.
- Calibrate your printer: Regularly check color profiles and nozzle health.
- Test before bulk: Always do a test press on a similar fabric to ensure color and durability.
- Handle the film carefully: Avoid touching the printed side to prevent smudging.
Common Mistakes to Avoid
Even experienced printers make mistakes. Here are some pitfalls to watch out for:
- Insufficient pressure: Not enough pressure can result in a weak bond.
- Incorrect temperature: Too low and the adhesive won't activate; too high and the film may melt.
- Peeling too early: If you peel while too hot, you might pull off the design.
- Ignoring fabric care: Some fabrics require different pressing times. Always test.
Applications and Business Opportunities
DTF transfers open up a world of possibilities. You can create custom t-shirts for events, personalized gifts, sportswear, and even work uniforms. Because the setup is minimal, it's perfect for small businesses or print-on-demand services. I've seen entrepreneurs start with a single DTF printer and grow into profitable businesses by selling transfers online or offering local printing services.
Frequently Asked Questions
Can I use DTF transfers on any fabric?
Yes, DTF works on most fabrics, including cotton, polyester, nylon, and blends. However, for heavyweight materials like canvas, you might need to adjust the pressure and time. It's always best to test on a scrap piece first.
How long do DTF transfers last?
With proper application and care, DTF transfers can last for many washes. They're known for their durability, especially compared to vinyl. To extend the life, wash garments inside out in cold water and avoid ironing directly on the print.
What equipment do I need for DTF printing?
You'll need a DTF printer (usually an Epson or similar converted printer), PET films, DTF inks, adhesive powder, and a heat press. Some suppliers sell complete kits with everything you need to start.
Is DTF printing cost-effective for small orders?
Absolutely. Unlike screen printing, there's no expensive setup, so you can print single items profitably. This makes it ideal for custom orders and small batches.
Can I use DTF transfers without a printer?
Yes, you can purchase pre-printed DTF transfers from suppliers. You just need a heat press to apply them. This is a great option for those who don't want to invest in printing equipment.
Final Thoughts
DTF transfers have revolutionized the custom apparel industry, offering a flexible, high-quality solution for both hobbyists and professionals. From my own experience, the learning curve is manageable, and the results are rewarding. Whether you're printing for fun or profit, mastering DTF will open up endless creative possibilities. So, give it a try, and you'll see why it's quickly becoming the preferred method for custom printing.