
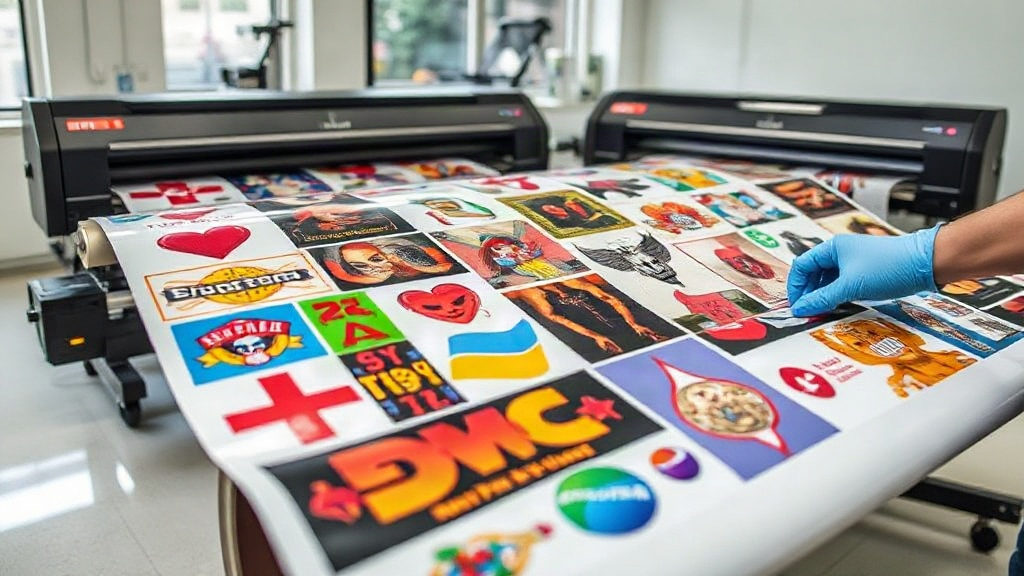
If you're in the custom apparel business, you've likely heard about DTF printing. It's a game-changer for transferring vibrant designs onto various fabrics. But did you know that how you arrange your designs on the transfer film can dramatically affect your efficiency and bottom line? Enter the DTF gangsheet – a method that groups multiple designs into a single sheet, saving you time, money, and hassle. In this guide, we'll dive deep into what a DTF gangsheet is, why it matters, and how you can create one like a pro to take your printing operation to the next level.
What Exactly Is a DTF Gangsheet?
A DTF gangsheet is essentially a large sheet of DTF transfer film that contains multiple designs printed together in one go. Instead of printing each design individually, you 'gang' them up – arranging them efficiently to maximize the use of the film. This approach is similar to gang printing in offset lithography, where multiple jobs are combined on a single sheet to reduce waste and setup time. For DTF printing, gangsheets allow you to produce a variety of transfers in a single print run, which is especially useful for small businesses that handle diverse orders or need to restock popular designs.
The concept is simple: you take all the designs you need for a given period – say, a week's worth of orders – and arrange them on a single canvas using specialized software. Then, you print that one sheet, powder it, cure it, and you're ready to press. It's a massive time-saver compared to printing one-offs.
Why Use a DTF Gangsheet? The Benefits Unveiled
You might be wondering, why bother with gangsheets? Can't you just print each design as it comes? Well, you could, but you'd be missing out on some serious advantages. Let's break down the key benefits.
Time Efficiency: Print Once, Press Many
The most obvious benefit is time. Setting up a DTF printer for each individual design involves repeated steps: loading film, adjusting settings, printing, powdering, curing. With a gangsheet, you do all of that once for multiple designs. Imagine printing 20 different designs in the time it used to take for one. That's a huge productivity boost, allowing you to fulfill orders faster and take on more work.
Cost Savings: Less Waste, More Profit
DTF film and ink aren't cheap. By nesting designs closely together on a gangsheet, you minimize wasted space. You can fit more designs per linear foot of film, reducing your material costs. Additionally, less setup time means lower labor costs. These savings add up quickly, improving your profit margins.
Consistency and Quality Control
When you print designs together, they go through the same conditions: same ink density, same powder application, same curing time. This consistency ensures that every transfer in the batch has the same quality. You avoid variations that can occur when printing one-offs, where environmental factors or printer settings might drift.
Scalability for Small Businesses
For small DTF shops, gangsheets make it feasible to offer a wide range of designs without keeping a huge inventory. You can print a gangsheet with popular designs, cut them apart, and have a ready stock of transfers. When a customer orders, you just press and ship. It's a scalable model that doesn't require a massive upfront investment in pre-printed stock.
How to Create a DTF Gangsheet: Step-by-Step
Creating a gangsheet might seem daunting, but with the right tools and approach, it's straightforward. Here's a step-by-step guide to help you get started.
Step 1: Gather Your Designs
Collect all the designs you need to print. This could be a mix of customer orders, your own artwork, or best-sellers you want to restock. Ensure each design is in a high-resolution format (300 DPI or higher) and has a transparent background. If not, use design software to clean them up.
Step 2: Choose the Right Software
You'll need software that allows you to arrange multiple designs on a single canvas. Popular options include Adobe Photoshop, Illustrator, or dedicated DTF rip software like Cadlink or AcroRIP. Some printers come with their own gangsheet tools. The key is to have precise control over placement and sizing.
Step 3: Set Up Your Canvas
Create a new document with the dimensions of your DTF film roll. Common widths are 13 inches, 17 inches, or 24 inches. The length can be as long as your printer supports – often up to several feet. Set the resolution to 300 DPI and the color mode to CMYK or RGB depending on your printer's requirements.
Step 4: Arrange Designs Efficiently
This is where the magic happens. Import your designs and start placing them on the canvas. Use nesting techniques to minimize gaps. Rotate designs if needed to fit better. Leave a small margin (about 0.25 inches) between designs for easy cutting. Also, consider the grain of the film – usually, you want designs oriented in the same direction for consistent feel.
Pro tip: Group similar sizes together or organize by order to simplify cutting and sorting later. Some software has auto-nesting features that can do this for you, but manual adjustment often yields better results.
Step 5: Add Registration Marks (Optional)
If you're using a cutter or want precise cutting, add registration marks at the corners of each design. These marks help automated cutters recognize the design boundaries. For manual cutting, you might skip this, but it can still aid in alignment.
Step 6: Print, Powder, and Cure
Once your gangsheet is ready, print it using your DTF printer. Follow your printer's settings for ink density and pass count. After printing, apply hot melt adhesive powder evenly, shake off excess, and cure the sheet in an oven or with a heat press. Now your gangsheet is ready to be cut into individual transfers.
Step 7: Cut and Store
Using scissors or a cutter, separate each design. Store them in a cool, dry place away from direct sunlight. Properly stored DTF transfers can last for months, so you can build a library of ready-to-press designs.
Best Practices for DTF Gangsheets
To get the most out of your gangsheets, keep these best practices in mind.
- Plan ahead: Group designs by similar ink coverage or color profiles to avoid printing issues. For example, designs with heavy white underbase might need different settings than lighter ones.
- Test your layout: Before printing a full gangsheet, do a small test print of a section to check for color accuracy and alignment.
- Use quality film: Not all DTF films are created equal. Invest in high-quality film that releases cleanly and holds detail.
- Keep a digital archive: Save your gangsheet files. You can reuse them to reprint popular combinations, saving even more time.
- Mind the margins: Leave enough space between designs for easy cutting. Too close, and you risk damaging adjacent transfers when cutting.
Common Mistakes to Avoid
Even seasoned printers can slip up. Here are pitfalls to watch for.
- Overcrowding: Trying to fit too many designs can lead to cutting errors and ink bleeding. Give designs room to breathe.
- Inconsistent sizing: Double-check that each design is the correct size. A small error in scaling can ruin a whole sheet.
- Ignoring color profiles: DTF printing uses CMYK and white ink. Make sure your designs are in the correct color mode and that your RIP software handles color management properly.
- Skipping the powder step: Incomplete powder application leads to poor adhesion. Ensure even coverage.
- Improper curing: Under-curing results in washes out; over-curing makes the transfer brittle. Follow your powder's curing guidelines.
Frequently Asked Questions About DTF Gangsheets
What is the maximum length of a DTF gangsheet?
The maximum length depends on your printer and the film roll. Most DTF printers can handle rolls up to 100 meters or more, but practical limits are often around 1-2 meters for easy handling. Check your printer's specifications for exact limits.
Can I mix different designs with varying ink coverage on one gangsheet?
Yes, but it's tricky. Designs with heavy white underbase require more ink and powder, which can affect curing times. It's best to group designs with similar ink coverage to ensure consistent results. If you must mix, adjust your settings accordingly and test first.
How do I cut a DTF gangsheet accurately?
You can cut manually with sharp scissors or a rotary cutter, following the design outlines. For precision, use a vinyl cutter with registration marks. Always cut slightly outside the design edge to avoid trimming into the print.
What file format is best for gangsheet designs?
PNG with transparent background is ideal. Ensure high resolution (300 DPI) and correct color mode. Some RIP software also accepts PDF or TIFF.
How should I store unused DTF transfers from a gangsheet?
Store them in a cool, dry place, away from direct sunlight and moisture. Place them in a sealed bag or container to prevent dust. Properly stored, they can last up to 6 months or more.
Mastering the DTF gangsheet is a skill that pays off in spades. By optimizing your printing workflow, you'll save time, reduce costs, and deliver consistent quality to your customers. Whether you're a solo entrepreneur or running a growing print shop, incorporating gangsheets into your process is a smart move. Start small, experiment with layouts, and soon you'll wonder how you ever managed without them.